An L-Bar bulletin board template can be created in CASTUS Cuts, a multi-region non-linear editor.
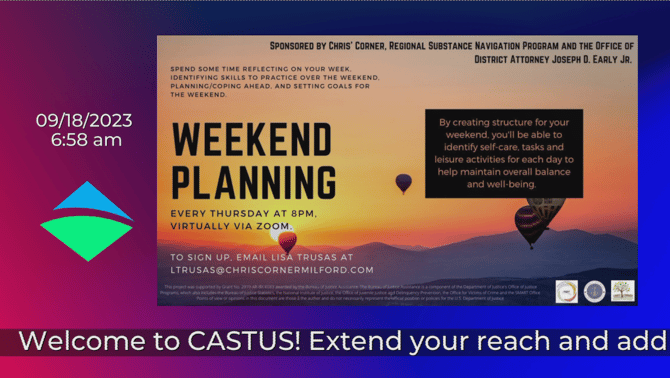
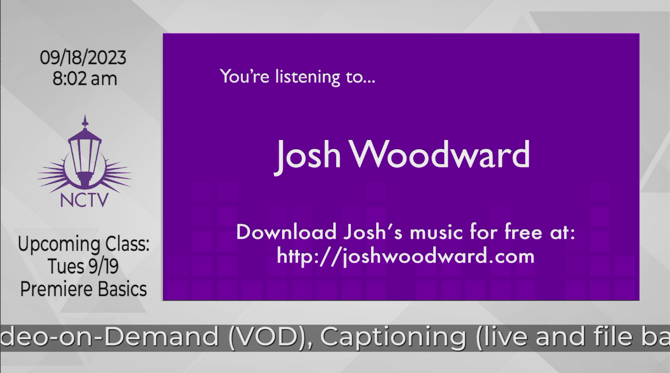
An L-Bar displays a distinct “L” shape framing your bulletins, allowing you to showcase additional information like a scrolling notification bar, current date and time, your organization’s logo, upcoming broadcasts or events, and more.
Adding a Background
- Open CASTUS > CASTUS Cuts.
- Choose a background either from the C4 Content folder or upload your own. The background can be a looping video or a still image.
- Click the background once in the library widget to select it and click into the white space next to Region 1 to add your content to the CASTUS Cuts project.

- Additional layers such as text items, logos, and your bulletin board messages can be added and adjusted. Drag the edges of the item in the viewer screen to resize and click and drag the item in the viewer screen to reposition.
Adding Main Content
- Prepare your bulletin board messages or videos either in a Simple Playlist , CASTUS Cuts Project, or a Smart Folder.
- Navigate to the item you want to include in the library widget and click on it once to select it.
- Click in the white space next to Add Frame to add your bulletins into your L-Bar project. This can also be done with your full schedule. If using your full schedule, select the schedule you wish to use and insert it via the same method.
- Use the controls in the viewer to resize and place the item in the top right corner to create a classic L-Bar, or another location you desire.
Adding a Text Field
- Create your Text Item and choose to have it scroll or static, not moving.
- Navigate to the item you want to include in the library widget and click on it once to select it.
- Click in the white space next to Add Frame to add your text item into your L-Bar project.
- Use the controls in the viewer to resize and place the item where desired.
Adding the Date and Time
- Create your Text Item with the following syntax for the current date and time:
Item Syntax Current Date %{date;now;mm/dd/yyyy}% Current Time %{time;now;;12h,ampm}% - Navigate to the item you want to include in the library widget and click on it once to select it.
- Click in the white space next to Add Frame to add your text item into your L-Bar project.
- Use the controls in the viewer to resize and place the item where desired.
Adding a Logo
- Upload your logo or image with transparency such as a PNG file.
- Navigate to the item you want to include in the library widget and click on it once to select it.
- Click in the white space next to Add Frame to add your text item into your L-Bar project.
- Use the controls in the viewer to resize and place the item where desired.