
This article will cover how to convert a VTT caption file into a regular transcript using the Text Edit program that comes standard with a Mac computer. This works with pop-on captions only and does not work with roll up captions. Roll up captions will have the same line multiple times in the VTT file.
NOTE: This is not a CASTUS program and is subject to change. For now, we thought this information would be useful to our caption customers who are looking to convert their caption file to a transcript.
- Download your VTT caption file.
- On your server, select the dropdown to the left of the file name and select file > download OR
- On the cloud, head to the captions tab of your captioned video and select download captions.
-
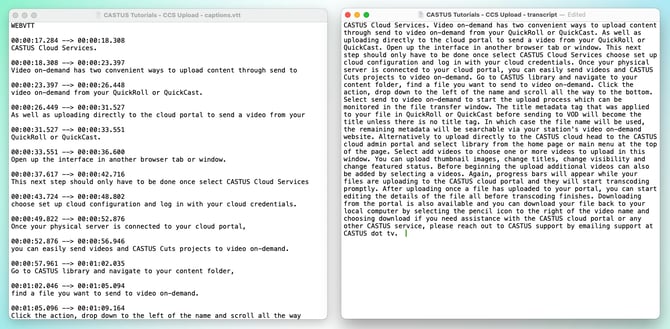
Open your VTT file in Text Edit on your Mac computer. This is likely the default program for opening VTT files.
-
Delete the WEBVTT header.
-
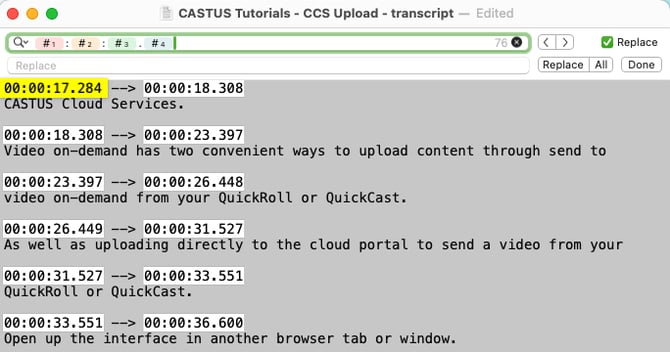
Press command + F on your keyboard to open the find function and select replace on the far right of the menu to bring up the find and replace dialogue box.
-
Erase the timecodes:
-
Put your cursor in the find box and select the magnifying glass to the left.
-
 Choose Insert Pattern and then Digits.
 - Add a colon via your keyboard.
- Repeat b and c so you have “digit:digit:digit,” being sure to select the gray “digit” and not the new colored digit options at the bottom.
- Add a period via your keyboard.
- Add one more digit via step b.
- All of your timecodes in your transcript should now be highlighted.
-
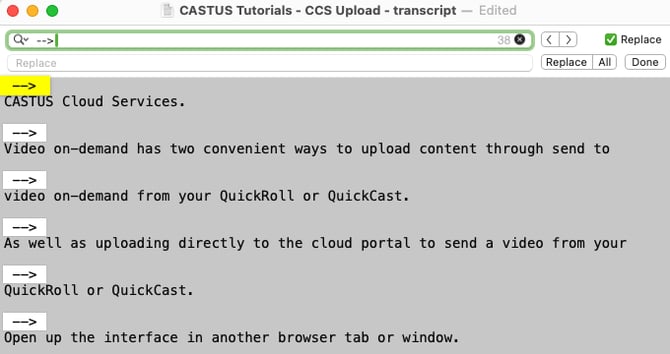
- Delete the arrows between the timecodes.
- Erase your digit sequence and replace with -->.
- All of your arrows should now be selected.
- Select all to the right of replace to delete all of the arrows.
- Now we’ll erase the line breaks using a similar method to #5.
- Erase your arrow sequence and select the magnifying glass to the left of the “find” box.
- Choose Insert Pattern and then Line Break.
- In the replace line, add one space.
- Select all to the right of replace to replace all of the line breaks with a space.
-
Finally, we can clean up our transcript by erasing spots where there are multiple spaces in a row.
-
Erase your line break and replace with two spaces by pressing the spacebar on your keyboard twice.
-
Select all to the right of replace to replace all of the double spaces.
-
Repeat step b until all of your double spaces are removed.
-
You now have something much more resembling a transcript than a caption file.