
QuickRoll units contain two or three hard drives located in the drive bay on the left side of the server. Occasionally, you'll be asked by support to reseat or replace a drive. Please follow the below procedure to accomplish this.
NOTE: If you are replacing a drive and need assistance rebuilding the RAID, please contact support@castus.tv. A tech support will be required after powering the unit back on.
Opening the Drive Bay
- Start by powering down your unit using a short press to the black rocker under the right outer door.
- Position yourself in front of the CASTUS unit so you can see the front decals, keylock, and left and right doors.
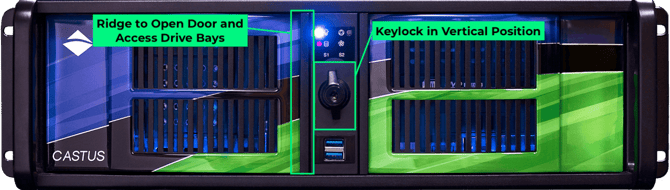
- Rotate the latch around the keylock to the vertical position so it is unlatched.
- Open the left outer door by inserting your left hand fingers under the right ridge of the door as shown in the diagram and pulling out on the door.
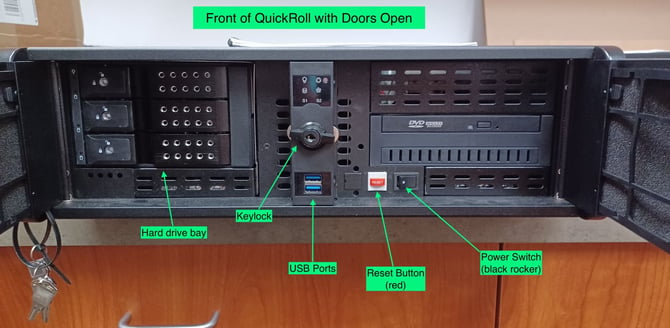
- Once the outer door is open, for each of the drive bays place your fingers under the release (⅓ of the distance from the left), and pull out to open the drive bay.
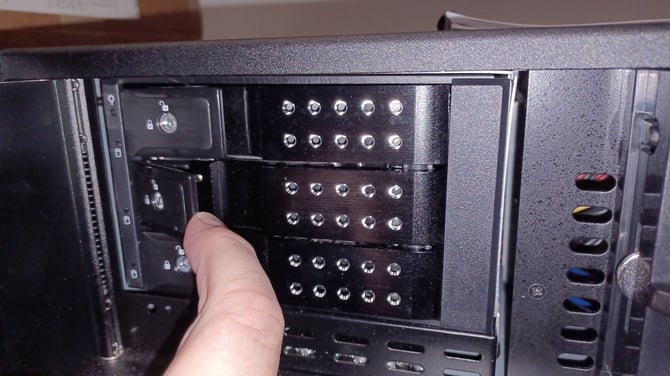
- If there is a drive currently in that slot, it will begin to come out. Gently remove the drive from the bay.
Reseating or Replacing the Drive
-
To reseat a drive, use the same drive that was removed. If you've been asked to put the drive in a different slot, please utilize the empty slot. Otherwise, replace the drive into the same slot it came out of. To replace the drive, use the new drive.
-
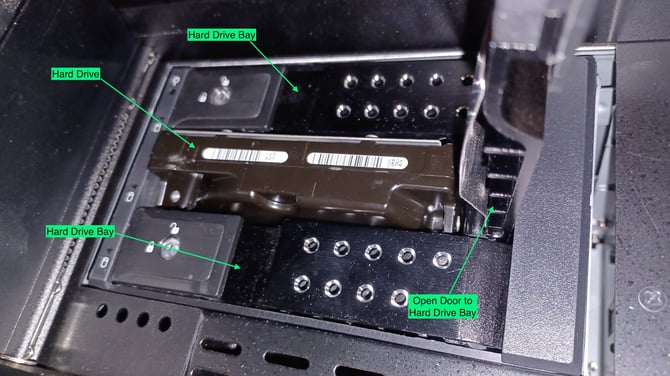
Position the drive label up with the connector at the back bottom of the drive.
- Carefully keep the drive level and slide it partially into any of the slots as far as it will go without resistance. The drive order does not matter.
- Next, close the inner door gently, which will force the drive to slide the rest of the way in.
- You should feel mild resistance as it slides into the connector.
- Close the outer left door and rotate the keylock to the horizontal position to latch.