
Go Live
Broadcasting live from an SDI or IP input is an excellent method to deliver urgent content to your audience. After configuring your inputs, you can effortlessly initiate a live broadcast at a predetermined time or manually through CASTUS.
Schedule Live
-
Open your current schedule by selecting it from below the confidence monitors or by double-clicking it in the Library.
-
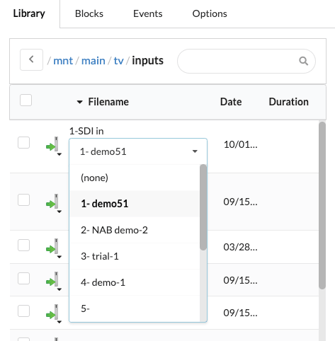
In the media widget on the right, navigate to tv >inputs to view all available inputs.
-
If a router is configured, select the desired route from the dropdown below the input.
-
Click once on the input you want to use so the checkbox is marked.
-
Click into your schedule at the point where you want the live stream to begin.
-
In the popup window, enter the duration of your live stream and select Submit.
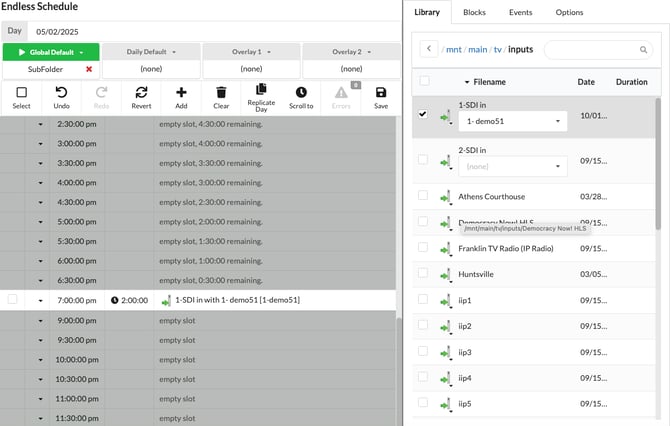
- Save your schedule to apply the changes.
NOTE: To end your live stream early, remove it from your schedule and save the changes, or utilize video flags to establish a condition that reverts the schedule to its default state.
Go Live Manually
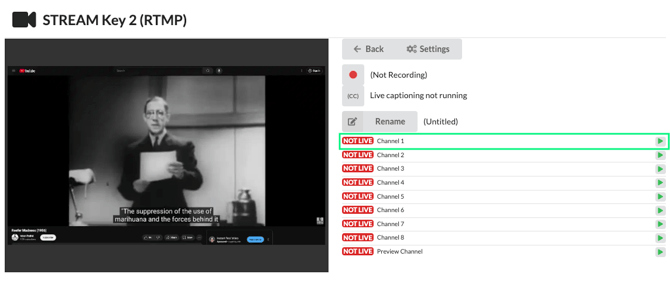
- Head to the controls page of your input by:

- Going to CASTUS > Settings and choosing the Inputs tab. Then select the controls button.
OR - Select the Inputs tab above your confidence monitors and choose the controls button for your input.

- Going to CASTUS > Settings and choosing the Inputs tab. Then select the controls button.
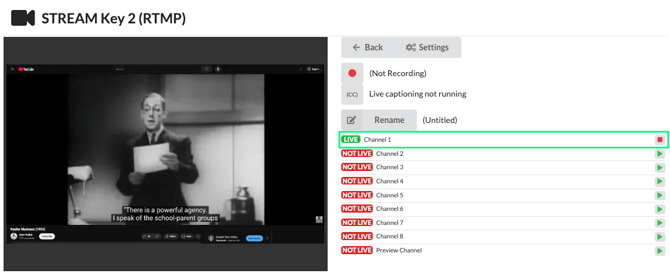
- Press the play button to the right of the channel you want to go live on.
- Confirm you want to go live.
- To end live, press the stop button to the right of the channel it's live on.
- Confirm you want to stop live.
Record
Ensure you record your event! Utilize timer record to automatically start and stop recording, or manually control it for complete oversight of your recording.
Timer Record
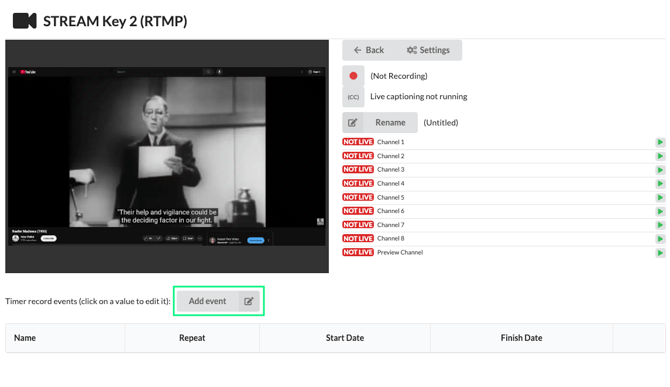
- Head to the controls page of your input by:
- Going to CASTUS > Settings and choosing the Inputs tab. Then select the controls button.
OR - Select the Inputs tab above your confidence monitors and choose the controls button for your input.
- Going to CASTUS > Settings and choosing the Inputs tab. Then select the controls button.
- Select Timer Record below the input preview.
- Name your recording.
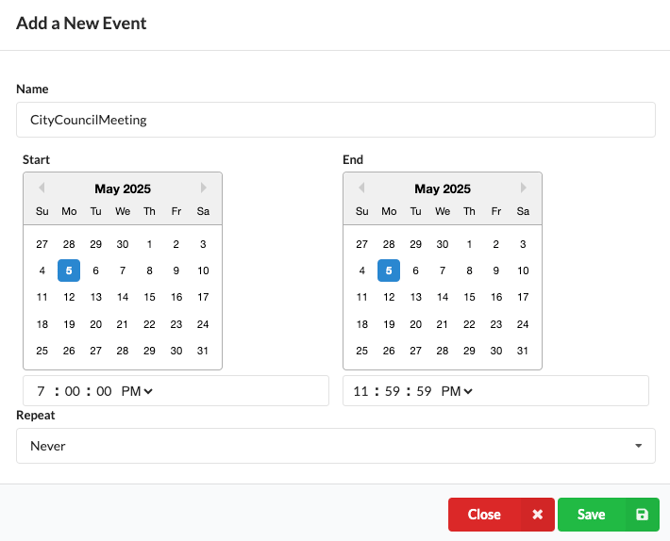
- Choose the start date from the date picker on the left and enter a time below.
- Repeat on the right for the end date and time.
- Choose whether this recording never repeats, repeats daily, or repeats weekly.
- Save your selection.

Record Manually
- Head to the controls page of your input by:
- Going to CASTUS > Settings and choosing the Inputs tab. Then select the controls button.
OR - Select the Inputs tab above your confidence monitors and choose the controls button for your input.
- Going to CASTUS > Settings and choosing the Inputs tab. Then select the controls button.
- Select Rename to the right of the preview screen and name your recording.
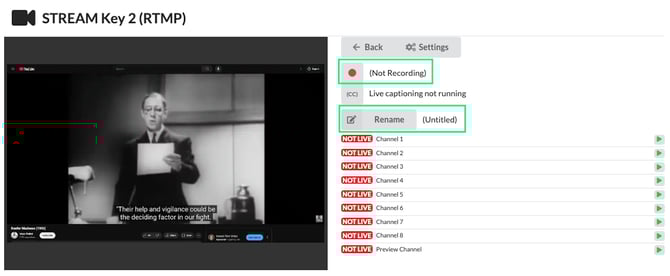
- Press the red record button to start recording.
- Press the stop button to end recording.
NOTE: You can locate recordings in the Recordings folder within the main directory of the Library. Each input will automatically generate its own folder, where your recordings will be stored.